Getting Started
This guide installs canvas_mojo, renders a first PNG, and shows how the same drawing routine targets SVG and PDF.
Install the package
Start with Pixi installed and available as pixi in your terminal. The
package supports Linux x86-64 and macOS Apple Silicon and requires
Mojo 1.1 or newer. Pixi installs the Mojo compiler along with the
library.
Create a directory for your project:
mkdir first-drawing
cd first-drawing
Save this complete configuration as pixi.toml:
[workspace]
name = "first-drawing"
version = "0.1.0"
channels = ["https://conda.modular.com/max", "conda-forge"]
platforms = ["linux-64", "osx-arm64"]
preview = ["pixi-build"]

[dependencies]
mojo = ">=1.1.0"
canvas_mojo = { git = "https://github.com/randyzwitch/canvas_mojo.git", branch = "main" }
Run pixi install in that directory. The first installation builds the
package from its Git source and can take a few minutes. The configuration
tracks main; use a release tag instead of branch when you need to pin
the library version. Commit your project’s pixi.lock to share its
resolved environment.
The dependency is named canvas_mojo, but the importable package is
named canvas:
from canvas import Canvas, ColorRender a PNG
Create first_drawing.mojo:
from canvas import Canvas, Color, fill_circle_aa, write_png


def main() raises:
    var canvas = Canvas(320, 200, Color(250, 250, 252))
    canvas.fill_rect(30, 30, 120, 140, Color(40, 100, 200))
    fill_circle_aa(canvas, 220, 100, 65, Color(30, 160, 80, 190))
    write_png(canvas, "first_drawing.png")
Run it from your project:
pixi run mojo run first_drawing.mojoOpen first_drawing.png in the same directory. It should look like this:
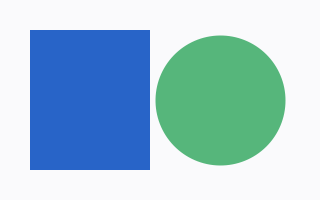
Canvas owns an RGBA pixel buffer. The constructor fills the entire
buffer with the supplied color, drawing calls modify it, and write_png
writes those pixels to disk.
Functions ending in _aa draw anti-aliased edges. Plain variants such
as fill_circle and draw_line are hard-edged.
Methods and free functions
canvas.fill_circle_aa(...) and fill_circle_aa(canvas, ...) both draw
on a raster Canvas. Free functions take the canvas as their first
argument and must be imported separately. Methods are also the interface
for drawing through DrawTarget: use target.fill_circle_aa(...) when
the target might be raster, SVG, or PDF. The shared trait covers only
part of each backend’s API.
Render SVG and PDF
The three backends implement DrawTarget. Put shared drawing operations
in a generic function:
from canvas import Canvas, Color, PdfCanvas, SvgCanvas
from canvas import write_pdf, write_png, write_svg
from canvas.vector.draw_target import DrawTarget


def draw_scene[T: DrawTarget](mut target: T) raises:
    target.fill_rect(30, 30, 120, 140, Color(40, 100, 200))
    target.fill_circle_aa(220, 100, 65, Color(30, 160, 80, 190))


def main() raises:
    var raster = Canvas(320, 200, Color(250, 250, 252))
    draw_scene(raster)
    write_png(raster, "scene.png")

    var svg = SvgCanvas(320, 200)
    draw_scene(svg)
    write_svg(svg, "scene.svg")

    var pdf = PdfCanvas(320, 200)
    pdf.fill_rect(0, 0, 320, 200, Color(250, 250, 252))
    draw_scene(pdf)
    write_pdf(pdf, "scene.pdf")
SvgCanvas and PdfCanvas do not have an implicit background. Draw one
when the output should be opaque. PDF dimensions are points; raster and
SVG dimensions are pixels or user-space units.
DrawTarget carries the shapes, paths, bulk markers, meshes,
draw_image, rectangle clips, batches, and the transform, blend and
color-space state. Text, path clips, and some paint operations are
backend-specific. Use the concrete backend when the trait does not
expose the operation you need.
Next steps
- Read Coordinates and Colors before placing precise geometry.
- Read Shapes and Paths for the drawing APIs.
- Read Transforms and State before composing local coordinate systems or clips.
- Read Text for measurement, layout reuse, and font caching.
- Browse the Examples for complete rendered programs.